
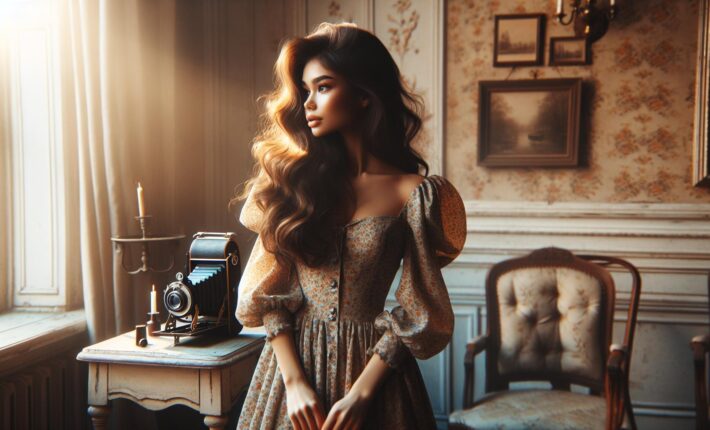
I’ve always been fascinated by the timeless appeal of vintage photographs – those beautifully aged images that tell stories through their faded colors and artistic imperfections. It’s not just about applying a sepia filter or mimicking old film effects; creating authentic retro-looking photos is an art that combines technique, creativity, and understanding of classical photography styles.
The vintage aesthetic has become increasingly popular in modern photography, with photographers seeking to capture that nostalgic atmosphere that transforms ordinary moments into timeless memories. Whether you’re shooting black and white, experimenting with film camera effects, or incorporating classic objects into your compositions, there are countless ways to achieve that coveted retro look. Let’s explore how you can master the art of vintage-style photography and create images that look like they’ve been discovered in your grandmother’s attic.
Understanding the Retro Photography Style
Retro photography encompasses specific visual elements that create an authentic vintage aesthetic. How to take retro looking photos requires understanding both the technical aspects and artistic characteristics that defined different photographic eras.
Classic Vintage Characteristics
Vintage photographs display distinct features that set them apart from modern images:
- Faded colors with muted tones reminiscent of aged film
- Soft focus effects creating dreamy atmospheres
- Light leaks appearing as streaks of orange or pink
- Film grain adding texture to the image
- Vignetting darkening the corners of photographs
- Color shifts toward sepia or cyan tints
- Dust spots creating authentic aging effects
Popular Retro Photography Eras
Each photographic era brings unique visual signatures:
1940s-1950s
- High contrast black & white images
- Formal poses with minimal backgrounds
- Sharp central focus with soft edges
1960s-1970s
- Saturated colors with warm undertones
- Square format compositions
- Polaroid-style white borders
- Cross-processed color effects
- Point-and-shoot camera aesthetics
- Date stamps in orange text
| Era | Key Features | Common Effects |
|---|---|---|
| 1940s-1950s | Monochrome | Grain, contrast |
| 1960s-1970s | Color film | Color shifts, borders |
| 1980s-1990s | Consumer cameras | Date stamps, flash |
Essential Camera Settings for Vintage Looks

Camera settings play a crucial role in creating authentic retro-looking photos. The right combination of exposure, white balance, lens choice, and aperture settings creates the foundation for vintage-style imagery.
Working With Exposure and White Balance
Exposure settings influence the aged appearance of retro photos. Slightly overexposed images create a faded, nostalgic look while subtle underexposure adds drama reminiscent of classic film photographs. White balance adjustments between 5500K and 6500K produce warmer tones characteristic of vintage images, while cooler temperatures around 4000K mimic early color film processes.
Choosing the Right Lens and Aperture
Lens selection and aperture settings determine the distinctive vintage look of photographs. Large apertures like f/1.2, f/1.8, and f/3.5 create the soft, dreamy backgrounds common in classic portraits. Manual focus proves more effective than autofocus when shooting with wide apertures, particularly in detailed scenes. Here’s how different aperture settings affect vintage styles:
| Aperture Range | Vintage Effect |
|---|---|
| f/1.2 – f/2.8 | Soft, dreamy backgrounds |
| f/4 – f/5.6 | Balanced vintage look |
| f/8 – f/16 | Classic street photography |
- Focus slightly away from the subject
- Use the widest aperture available on your lens
- Experiment with manual focus techniques
- Combine different aperture settings with various focal lengths
Creating Retro Effects While Shooting

Creating authentic retro effects starts during the photo capture process, incorporating specific techniques to achieve a vintage aesthetic without relying solely on post-processing.
Using Natural Light and Light Leaks
Natural light manipulation creates authentic vintage effects in retro-style photography. Position subjects near windows or use backlighting to create soft, diffused lighting characteristic of vintage photographs. Create light leaks by:
- Holding semi-transparent red or yellow objects near the lens edge
- Using colored gel filters for controlled light streaks
- Placing sunglasses or translucent folders partially over the lens
- Shooting during golden hour for warm, vintage-style lighting
- Utilizing side lighting to enhance texture aging effects
- Selecting locations with vintage architecture or period details
- Using antique furniture pieces as focal points
- Including era-specific vehicles or machinery
- Incorporating vintage clothing styles
- Choosing props with weathered textures or patinas
- Photographing at historical reenactments or restored sites
- Removing modern elements from frame composition
| Vintage Effect | Technical Setup | Result |
|---|---|---|
| Light Leaks | Red/Yellow Filter + Edge Coverage | Warm color bleeds |
| Period Scene | f/9, ISO 500, 1/45s | Historical authenticity |
| Natural Aging | Window Light + Diffusion | Soft, dated appearance |
Post-Processing Techniques

Post-processing transforms digital images into authentic retro photographs through strategic adjustments and creative effects. These techniques enhance the vintage aesthetic while maintaining image quality.
Color Adjustments and Toning
Split toning creates dramatic vintage effects by adding distinct colors to highlights and shadows. For highlights, a creamy yellow hue at high saturation (70-80%) produces pronounced warm tones. Shadows benefit from subtle green or blue tints at lower saturation (20-30%) to complement the image’s environment. Custom color selection offers precise control over the final look, while preset swatches provide quick vintage color combinations.
Adding Film Grain and Texture
Film grain adds authentic vintage character through controlled noise patterns. The Effect panel offers three key grain adjustments:
- Amount: Controls grain intensity (25-40% for subtle effect)
- Size: Determines grain particle dimensions (40-60 for classic film look)
- Roughness: Adjusts grain pattern irregularity (35-50% for natural appearance)
Alternatively, shooting at elevated ISO settings (3200+) creates in-camera grain patterns that mimic vintage film stocks. This technique produces organic noise patterns that enhance the retro appearance.
Creating Vintage Vignettes
Vignetting darkens image edges to create natural borders characteristic of vintage photographs. The technique involves:
- Edge Exposure: -15 to -30 for subtle darkening
- Feathering: 50-70% for smooth transitions
- Roundness: 40-60% for natural oval shapes
- Midpoint: 35-45 for balanced vignette placement
Strategic vignetting draws attention to the subject while adding period-appropriate edge characteristics found in classic photographs.
Advanced Retro Photography Tips

Advanced retro photography techniques transform modern digital images into authentic vintage masterpieces through specialized editing methods. These methods enhance the authenticity of retro-looking photos by manipulating core image elements.
Black and White Conversion Methods
Converting color photos to black and white requires strategic adjustments to create authentic vintage aesthetics. Reducing luminance in specific color channels creates distinctive tonal ranges characteristic of classic film stocks. Adjusting individual color channels affects how different colors translate to grayscale:
- Lower red channel values darken skin tones
- Increased yellow channel values brighten foliage
- Decreased blue channel values darken skies
- Added grain at 15-20% opacity mimics silver halide film texture
- Apply Gaussian blur at 2-3% strength to reduce excessive sharpness
- Add lens blur to outer edges at 5-8% intensity
- Create selective focus by maintaining sharpness only on key subject areas
- Use radial blur at 3-5% opacity for dreamy edge effects
- Apply surface blur at minimal strength to smooth skin tones while preserving texture
| Blur Type | Recommended Strength | Best Application |
|---|---|---|
| Gaussian | 2-3% | Overall softening |
| Lens | 5-8% | Edge effects |
| Radial | 3-5% | Dreamy borders |
| Surface | 1-2% | Skin smoothing |
Conclusion
Taking retro-style photos is both an art and a technical skill that I’ve found deeply rewarding. With the right combination of camera settings creative techniques and thoughtful post-processing you’ll be able to capture that timeless vintage charm in your images.
Remember that creating authentic retro photos isn’t just about applying filters – it’s about understanding and respecting the characteristics that made historical photography so special. I encourage you to experiment with different techniques and develop your unique vintage style.
By mastering these methods you’ll be able to transform ordinary moments into extraordinary memories that look like they’ve been pulled straight from a treasured family album.
Frequently Asked Questions
What makes a photograph look vintage?
Vintage photographs are characterized by specific visual elements including faded colors, soft focus, light leaks, film grain, and vignetting. Natural imperfections like dust spots and color shifts also contribute to the authentic retro appearance. These elements combined create that nostalgic feeling reminiscent of old photographs.
How can I achieve an authentic vintage look without filters?
Create vintage effects during the photo capture process by manipulating natural light, using window lighting or backlighting for soft diffusion. Select locations with vintage architecture, use antique props, and incorporate era-specific clothing. Manual camera settings and proper exposure techniques are more effective than relying on filters alone.
What camera settings work best for vintage-style photography?
Use slightly overexposed settings and cooler white balance to mimic early color film processes. Shoot with large apertures (f/1.8-f/2.8) to create soft, dreamy backgrounds. Manual focus techniques and varying focal lengths can enhance the retro effect. Consider shooting in black and white for a classic look.
Which eras are most popular in vintage photography?
The 1940s-1950s are known for high-contrast black and white images and formal poses, while the 1960s-1970s feature saturated colors and Polaroid-style borders. Each era has distinct characteristics that photographers can replicate through specific techniques and styling choices.
How important is post-processing for vintage photography?
While in-camera techniques are crucial, post-processing helps perfect the vintage look. Key adjustments include converting to black and white with specific tonal ranges, adjusting color channels, and applying strategic blur effects. However, post-processing should enhance rather than create the entire vintage effect.
What lighting techniques create the best vintage effect?
Position subjects near windows for soft, diffused lighting characteristic of vintage portraits. Golden hour shooting can create natural light leaks and warm tones. Using colored gel filters can simulate film effects, while backlighting helps create the dreamy atmosphere common in vintage photos.